🏆 Foundation Challenge
Complete this challenge to earn your NFT Certificate!
🚩 Foundation Challenge: 🪙 ERC20 Token Interactor
🪙 Create a comprehensive ERC20 token management system:
👷♀️ You'll compile and deploy your first Stylus-based ERC20 smart contract written in Rust. Then, you'll use a modern React app with essential components and hooks to interact with your token. Finally, you'll deploy your ERC20 contract to Arbitrum Sepolia and build a beautiful frontend for token management! 🚀
🌟 The final deliverable is a full-stack application that lets users mint, transfer, approve, and burn ERC20 tokens. Deploy your contracts to Arbitrum Sepolia testnet, then build and upload your app to a public web server.
Checkpoint 0: 📦 Prerequisites 📚
Before starting, ensure you have the following installed:
-
Rust (including
rustc,rustup, andcargo) - Install with (⚠️ Must use WSL terminal to run these commands):curl --proto '=https' --tlsv1.2 -sSf https://sh.rustup.rs | shsource ~/.bashrc # or restart your terminal -
cargo-stylus
-> Install cargo-stylus with the below command:cargo install cargo-stylus⚠️ Note for Ubuntu users: If you face issues related to pkg-config while trying to install cargo-stylus, run these commands:
sudo apt update sudo apt install pkg-config sudo apt install libssl-dev sudo apt install build-essential -
Foundry - Required for smart contract development
Foundry Installation Steps:
1. Open your WSL terminal.
2. Install Foundry using the official install script:
curl -L https://foundry.paradigm.xyz | bash
3. Add Foundry to your shell profile
After installation, you'll see instructions to add Foundry to your shell profile (like .bashrc or .zshrc). Usually, you can do:
export PATH="$HOME/.foundry/bin:$PATH"
Add the above line to your ~/.bashrc or ~/.zshrc file, then reload your shell:
source ~/.bashrc
source ~/.zshrc
4. Install Foundry binaries
foundryup
🔧 Version Requirements
Ensure your tools are ready to use:
Check your versions - ⚠️ Must use WSL terminal to run these commands
cargo stylus --version
cargo --version
rustup --version
rustc --version
curl --version
cast --version
forge --version
🚩 Challenge Setup Instructions
For Ubuntu/Mac Users:
-
Open your terminal.
-
Clone the repository:
git clone -b erc20 https://github.com/abhi152003/speedrun_stylus.gitcd speedrun_stylusyarn install
For Windows Users (Using WSL):
-
Open your WSL terminal.
-
Ensure you have set your Git username and email globally:
git config --global user.name "Your Name"git config --global user.email "your.email@example.com" -
Clone the repository:
git clone -b erc20 https://github.com/abhi152003/speedrun_stylus.gitcd speedrun_stylusyarn install
🛠️ Troubleshooting Common Issues
1. stylus Not Recognized
If you encounter an error stating that stylus is not recognized as an external or internal command, run the following command in your terminal:
sudo apt-get update && sudo apt-get install -y pkg-config libssl-dev
After that, check if stylus is installed by running:
cargo stylus --version
If the version is displayed, stylus has been successfully installed and the path is correctly set.
2. 🚨 Fixing Line Endings and Running Shell Scripts in WSL
⚠️ This guide provides step-by-step instructions to resolve the Command not found error caused by CRLF line endings in shell scripts when running in a WSL environment.
Shell scripts created in Windows often have CRLF line endings, which cause issues in Unix-like environments such as WSL. To fix this:
Using dos2unix:
-
Install
dos2unix(if not already installed):sudo apt install dos2unix -
Convert the script's line endings:
dos2unix run-sepolia-deploy.sh -
Make the Script Executable:
chmod +x run-sepolia-deploy.sh -
Run the Script in WSL:
bash run-sepolia-deploy.sh
💫 Checkpoint 1: Environment Setup & Contract Deployment
1. Configure Environment Variables
⚠️ IMPORTANT: You need to create
.envfiles in TWO different locations with different configurations!
📁 Location 1: For Contract Deployment (packages/erc20/.env)
Create a .env file in the packages/erc20/ directory:
# Required: Your wallet's private key (without 0x prefix)
PRIVATE_KEY=your_private_key_here
📁 Location 2: For Frontend (packages/nextjs/.env)
Create a .env file in the packages/nextjs/ directory:
# Required: Arbitrum Sepolia RPC URL
NEXT_PUBLIC_RPC_URL=https://sepolia-rollup.arbitrum.io/rpc

# Required: Your wallet's private key for contract interactions
NEXT_PUBLIC_PRIVATE_KEY=your_private_key_here
💡 Note: You can use the same private key in both files, but make sure to add it to BOTH locations before running any scripts!
🔧 Step-by-Step Environment Setup:
-
Create the first
.envfile for contract deployment:# Navigate to erc20 directory cd packages/erc20 # Create .env file touch .env # Add your private key (without 0x prefix) echo "PRIVATE_KEY=your_actual_private_key_here" > .env -
Create the second
.envfile for frontend:# Navigate to nextjs directory cd packages/nextjs # Create .env file touch .env # Add both required variables echo "NEXT_PUBLIC_RPC_URL=https://sepolia-rollup.arbitrum.io/rpc" > .env echo "NEXT_PUBLIC_PRIVATE_KEY=your_actual_private_key_here" >> .env
🚨 Critical: Both
.envfiles must be created BEFORE running the deployment script!
✅ Verify Your Environment Setup:
Before proceeding, verify that both .env files exist and contain the correct content:
# Check erc20 .env file
echo "Checking packages/erc20/.env:"
cat packages/erc20/.env

# Check nextjs .env file
echo "Checking packages/nextjs/.env:"
cat packages/nextjs/.env
You should see output similar to:
Checking packages/erc20/.env:
PRIVATE_KEY=your_actual_private_key_here

Checking packages/nextjs/.env:
NEXT_PUBLIC_RPC_URL=https://sepolia-rollup.arbitrum.io/rpc
NEXT_PUBLIC_PRIVATE_KEY=your_actual_private_key_here
⚠️ If either file is missing or empty, create them now before continuing!
2. Get Arbitrum Sepolia ETH
You'll need test ETH on Arbitrum Sepolia to deploy contracts and pay gas fees:
- Bridge from Ethereum Sepolia: Use the Arbitrum Bridge
- Faucets: Try Arbitrum Sepolia Faucet
3. Deploy the Smart Contract
# Navigate to the contract directory
cd packages/erc20

# Make the deployment script executable
chmod +x run-sepolia-deploy.sh

# Deploy to Arbitrum Sepolia
./run-sepolia-deploy.sh
Expected Output:
Checking connection to Arbitrum Sepolia...
Connected to Arbitrum Sepolia!
Deploying the Stylus contract using cargo stylus...
Stylus contract deployed successfully!
Transaction hash: 0x...
Contract address: 0x...
Deployment completed successfully on Arbitrum Sepolia!
4. Update Contract Address
After deployment, update the contract address in packages/nextjs/app/debug/_components/DebugContracts.tsx:
const contractAddress = "0x..."; // Replace with your deployed contract address
Checkpoint 2: 🎨 Frontend Magic
Start the Frontend Application
# Navigate to the frontend directory
cd packages/nextjs

# Start the development server
yarn dev
Visit http://localhost:3000 to access the application.
🏠 Home Page - Welcome Interface
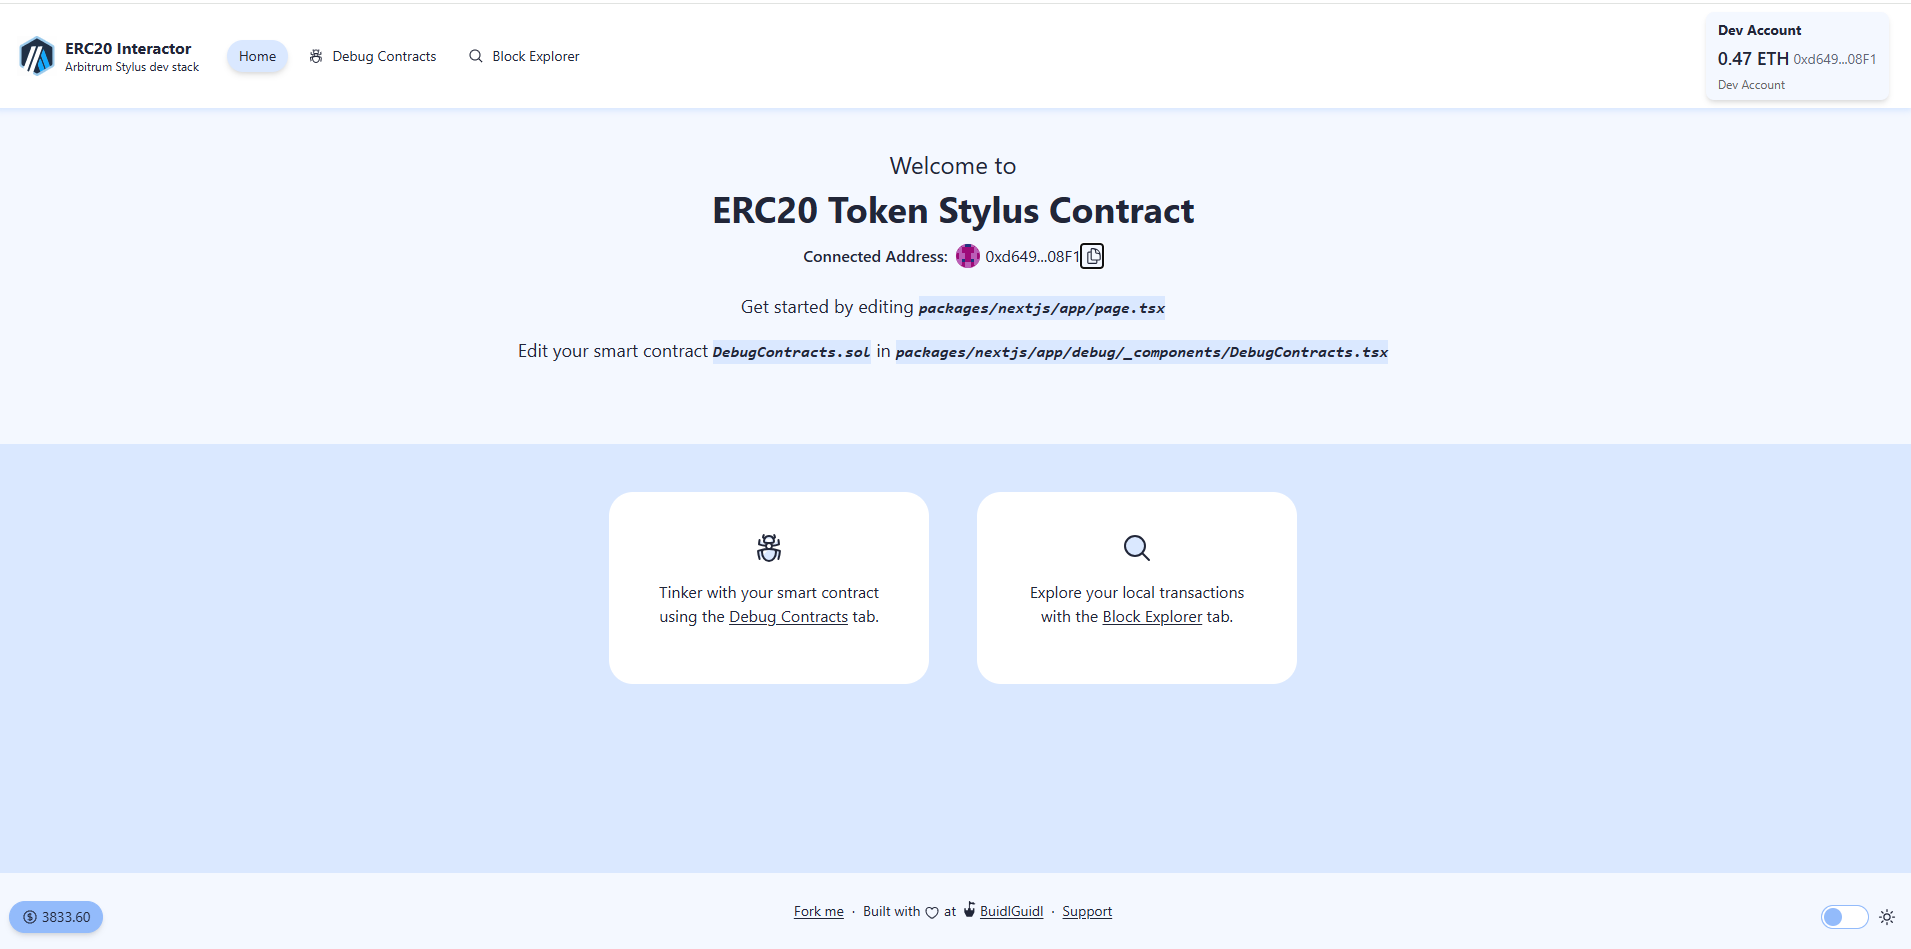 Visit
Visit localhost:3000 to see the welcome page with navigation to Debug Contracts and Block Explorer tabs
🔧 Debug Contracts - Token Operations
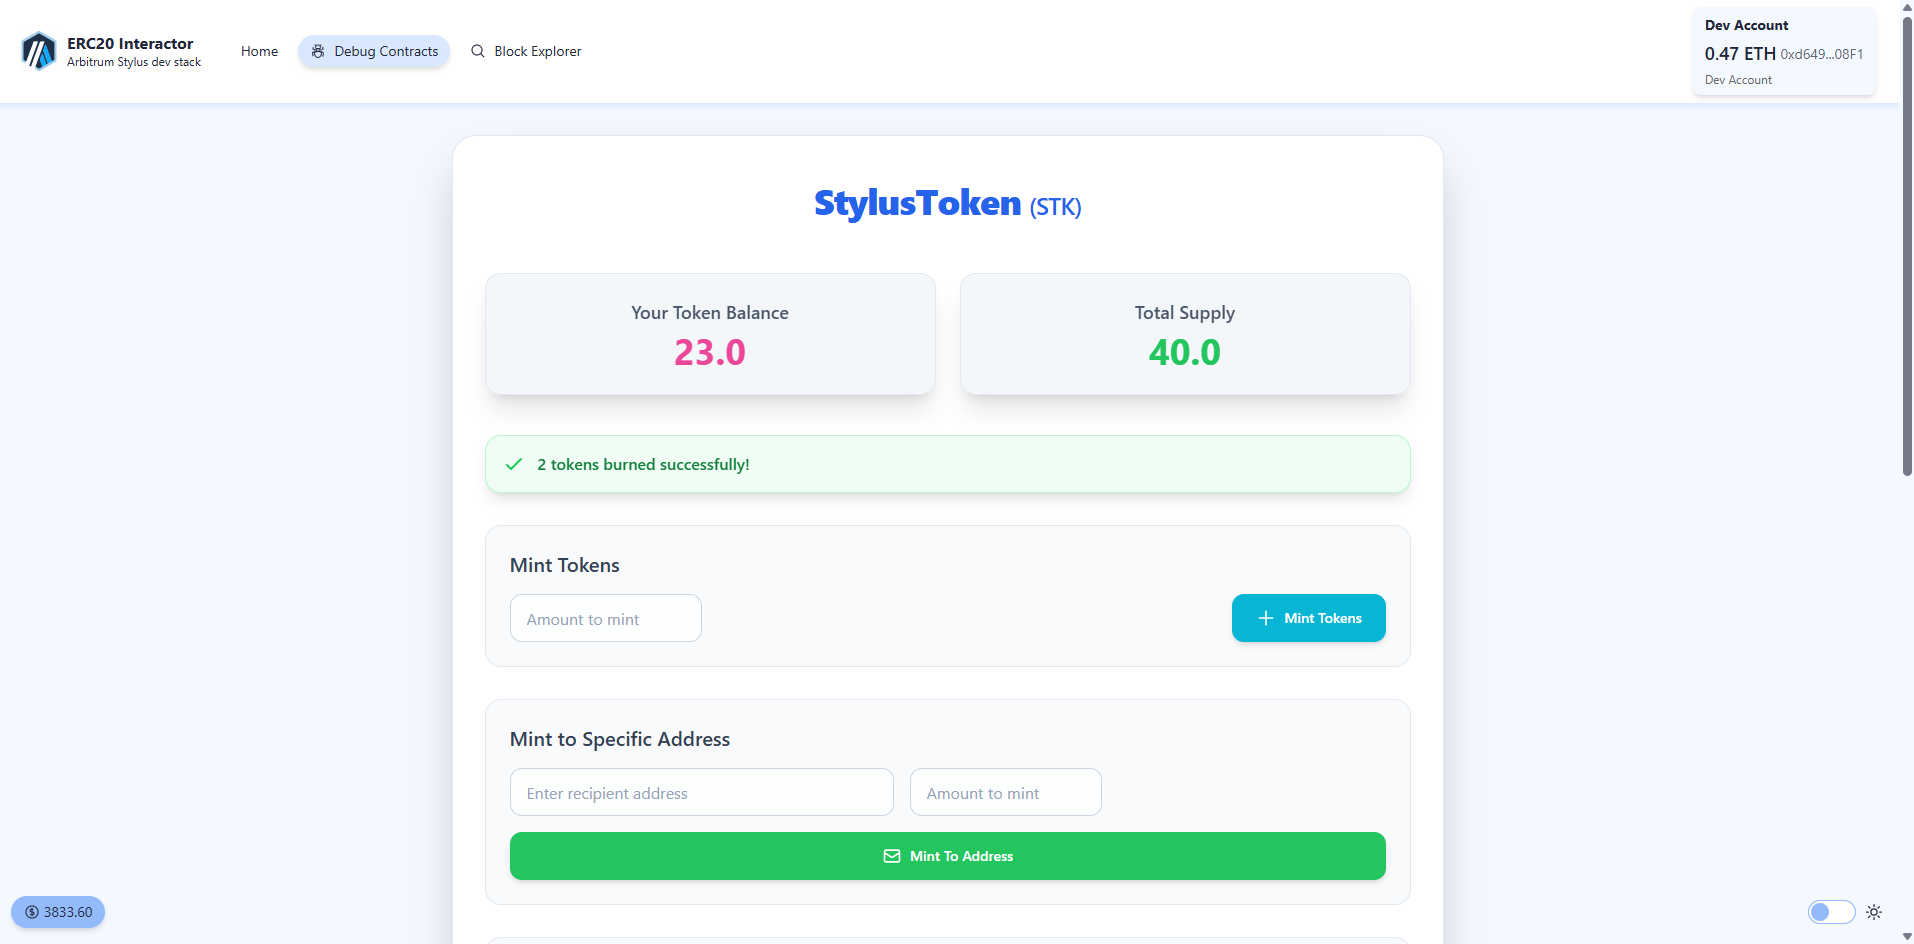 Navigate to "Debug Contracts" tab to mint, transfer, approve, and burn your STK tokens
📊 Block Explorer - Transaction History
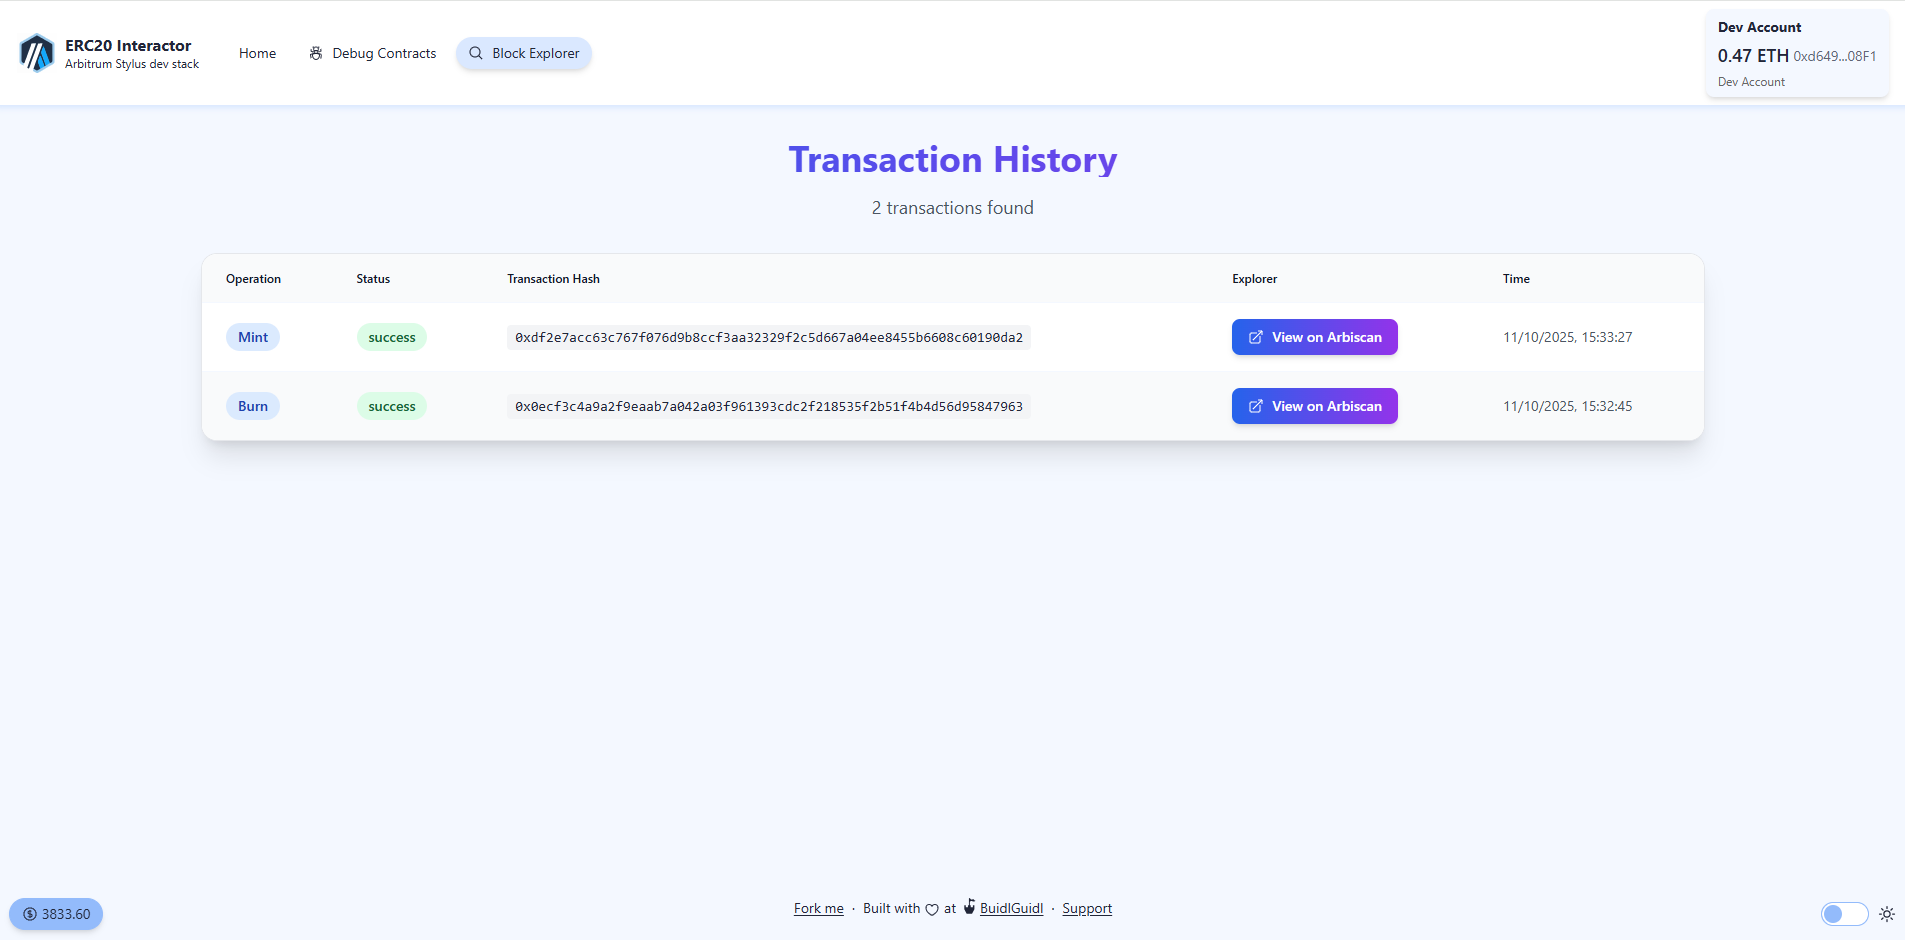 View all your transactions in the "Block Explorer" tab with direct links to Arbiscan
🔗 Arbiscan - Blockchain Verification
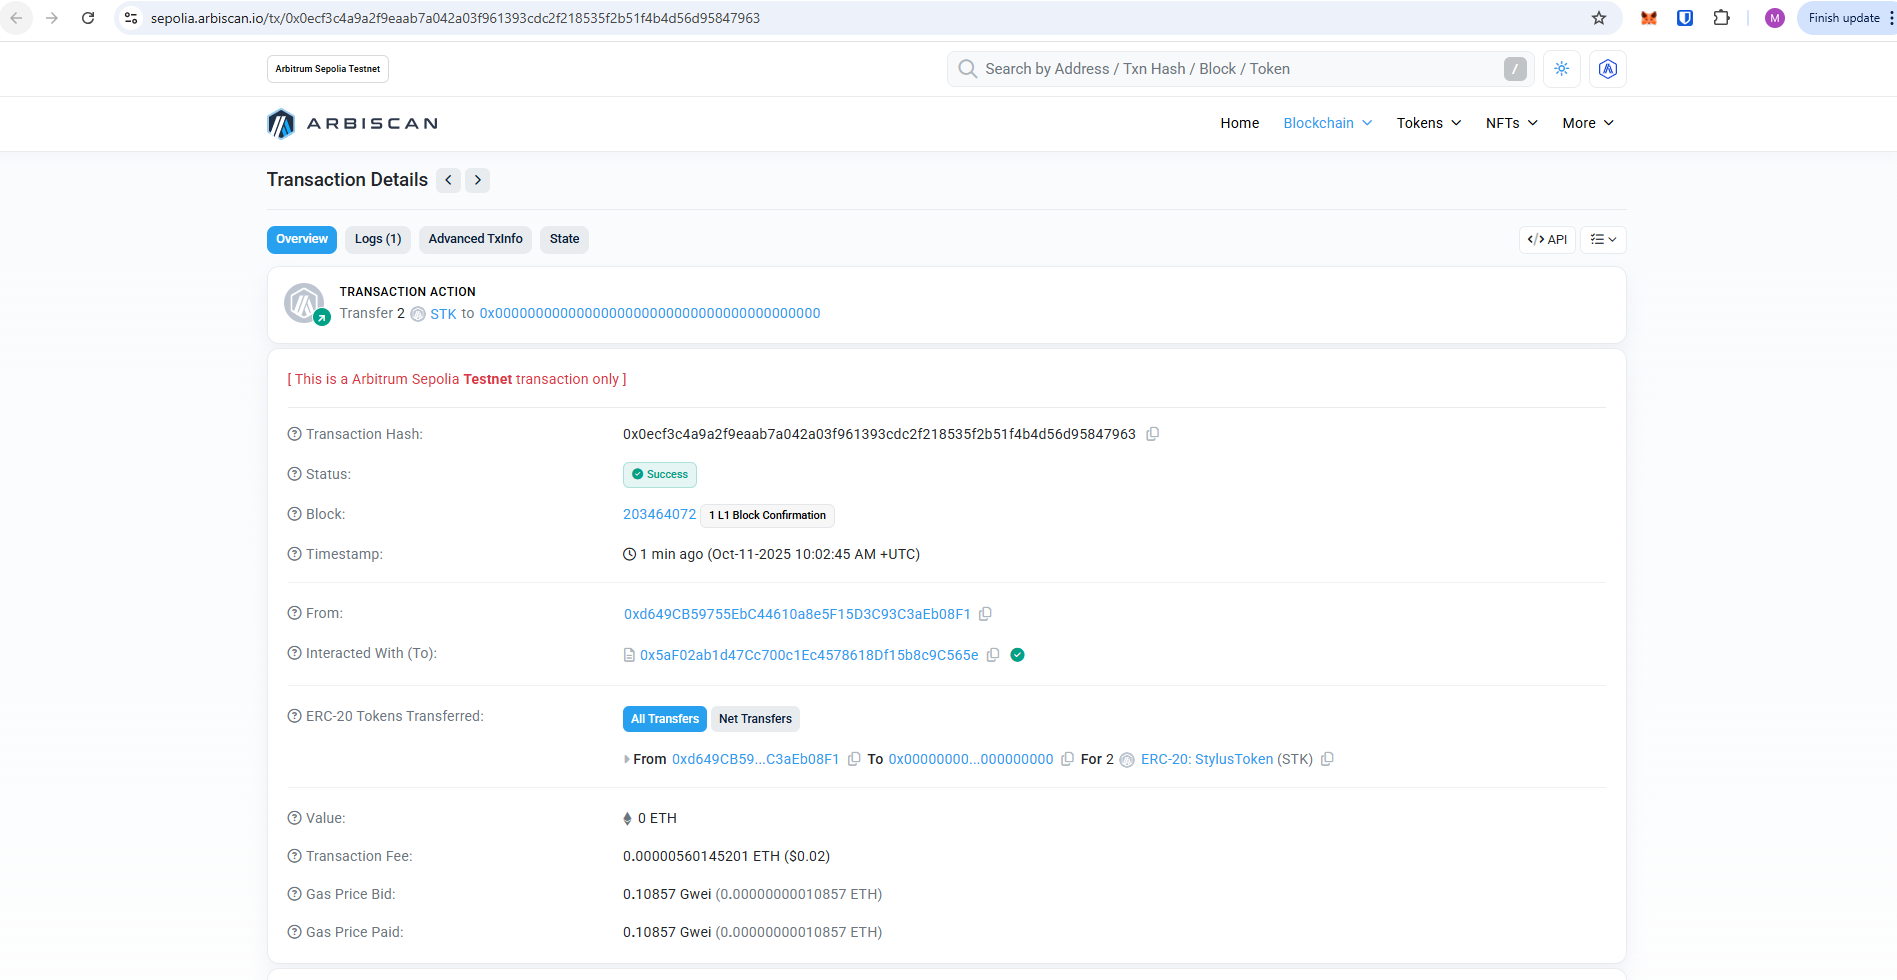 Click "View on Arbiscan" to see your STK token transactions verified on Arbitrum Sepolia blockchain
💼 Take a quick look at your deploy script run-sepolia-deploy.sh in packages/erc20/run-sepolia-deploy.sh.
📝 If you want to edit the frontend, navigate to packages/nextjs/app and open the specific page you want to modify. For instance: /debug/page.tsx. For guidance on routing and configuring pages/layouts checkout the Next.js documentation.
Checkpoint 3: 💾 Deploy your contract! 🛰
🛰 Your ERC20 contract is deployed to Arbitrum Sepolia using the run-sepolia-deploy.sh script
The deployment script will:
- Check Connection: Verify connectivity to Arbitrum Sepolia
- Deploy Contract: Use cargo stylus to deploy your Rust-based ERC20 contract
- Extract Details: Capture transaction hash and contract address
- Confirm Success: Display deployment confirmation
This deployment uses your provided private key to deploy the contract to Arbitrum Sepolia testnet.
Checkpoint 4: 🚢 Ship your frontend! 🚁
🚀 Deploy your NextJS App
yarn vercel
Follow the steps to deploy to Vercel. Once you log in (email, github, etc), the default options should work. It'll give you a public URL.
If you want to redeploy to the same production URL you can run
yarn vercel --prod. If you omit the--prodflag it will deploy it to a preview/test URL.
⚠️ Run the automated testing function to make sure your app passes
yarn test
Checkpoint 5: 📜 Contract Verification
You can verify your smart contract by running:
cargo stylus verify -e https://sepolia-rollup.arbitrum.io/rpc --deployment-tx "$deployment_tx"
It is okay if it says your contract is already verified.
🚀 Submitting Your Challenge
After you have completed all checkpoints and are ready to submit your solution, follow these steps:
-
Create a New GitHub Repository
- Go to GitHub and create a new repository (public or private as required by the challenge).
-
Set Your Local Repository's Remote URL
- In your project directory, update the remote URL to your new repository:
git remote set-url origin https://github.com/yourusername/your-repo.git
- In your project directory, update the remote URL to your new repository:
-
Push Your Code to GitHub
- Add and commit any changes if you haven't already:
git add . git commit -m "Initial commit for challenge submission" - Push your code:
git push -u origin main
- Add and commit any changes if you haven't already:
-
Submit Your Challenge
- Copy your repository link in the following format (without
.gitat the end):https://github.com/yourusername/your-repo - Use this link to submit your challenge as instructed.
- Copy your repository link in the following format (without
🔧 Smart Contract Details
Contract Structure
The smart contract is built using Stylus and implements a standard ERC20 token with additional minting and burning capabilities:
// Main contract functions
pub fn mint(&mut self, value: U256) -> Result<(), Erc20Error>
pub fn mint_to(&mut self, to: Address, value: U256) -> Result<(), Erc20Error>
pub fn burn(&mut self, value: U256) -> Result<(), Erc20Error>
Token Specifications
- Name: StylusToken
- Symbol: STK
- Decimals: 18
- Network: Arbitrum Sepolia
- Standard: ERC20 with mint/burn extensions
Arbitrum Sepolia Details
- Chain ID: 421614
- RPC URL:
https://sepolia-rollup.arbitrum.io/rpc - Block Explorer: Arbiscan Sepolia
- Bridge: Arbitrum Bridge
📚 Additional Resources
- Stylus Documentation
- Arbitrum Sepolia Faucet
- Arbiscan Sepolia Explorer
- Next.js Documentation
- Tailwind CSS Documentation
🔍 Analyze Your Contract with Radar
Radar by Auditware is a powerful static analysis tool designed to identify security vulnerabilities in Rust-based smart contracts. It uses a rule engine to detect common security issues like unchecked arithmetic, missing access controls, and account validation problems.
📦 Installation
Radar requires Docker to be installed and running on your system. Make sure Docker is installed and running before proceeding.
Install Radar using the official installation script: (⚠️ Windows users must use a WSL terminal)
curl -L https://raw.githubusercontent.com/auditware/radar/main/install-radar.sh | bash
This will install Radar globally on your system. Alternatively, you can install from source:
git clone https://github.com/auditware/radar.git
cd radar
bash install-radar.sh
Note: After installation, you must restart your terminal or run the following command so the system recognizes the newly installed radar:
source ~/.bashrc
🚀 Running Radar on Your Contract
From the root of your project, run Radar with:
radar -p .
This will analyze your entire project, including all contract code using Radar.
Radar will output:
- Console output: Real-time findings with severity levels (Low, Medium, High)
- JSON report: Detailed results saved to
output.jsonin your project directory
Example Output:
[ Low ] Unchecked Arithmetics found at:
 * /path/to/your/contract/src/lib.rs:49:34-44

[i] radar completed successfully. json results were saved to disk.
[i] Results written to /path/to/output.json
💡 Tip: The JSON output (
output.json) contains detailed information about each check, including severity, certainty, and locations of issues. Review it carefully to understand what needs to be fixed.
🏃 Head to your next challenge here.